Harness Fitting Guide
Nothing could be worse in safety than a false sense of security. The effectiveness of any harness not only depends on the correct matching of harness to activity, but also having the harness properly fitted. Many injuries or even death can be happened due to the improper use of safety harnesses.
In general, a snug fit on both the top and bottom sections of the harness is essential. It is also essential to inspect your harness before every use. You should not attempt to use a harness that has failed inspection, or does not have inspection tag on.
Whether you ever actually fall or not, you must treat the harness as it is going to save your life every time you put it on.
 |
 |
|
|
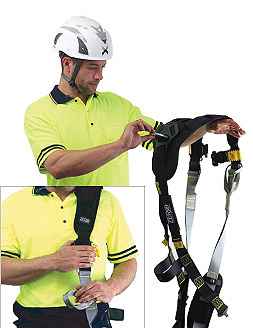
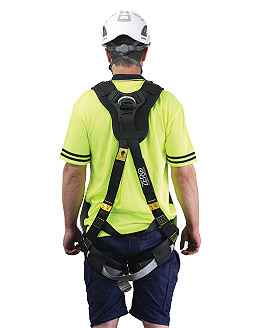
Step 1: Locate rear dorsal Fall Arrest D ring. Ensure harness is hanging freely and webbing isn’t twisted. Visual check of harness, fittings and labels. |
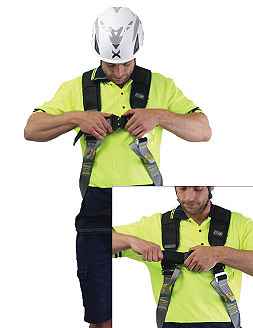
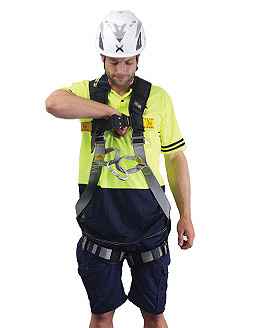
Step 2: Bring harness over other shoulder and clip the chest Quick Connect buckle. Adjust the chest strap to fit. |
|
 |
 |
|
|
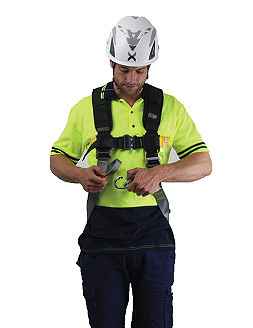
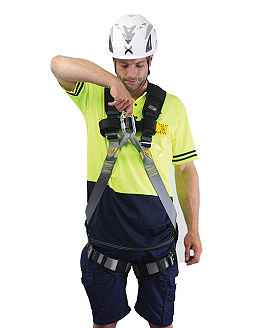
Step 3: Identify the front fall arrest loops. Place the karabiner through the front fall arrest loops and tighten the screw gate, to create the rated front Fall Arrest point. |
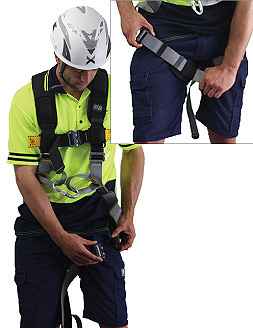
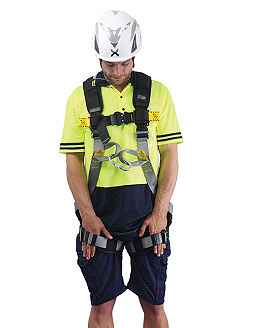
Step 4: Pull the leg strap up between the legs and connect with buckle. Repeat on other side. Tighten the leg straps to fit, tucking any excess webbing into holders. |
|
 |
 |
|
|
Step 5: Correct fit on leg straps should allow a flat hand to be placed behind the leg strap. |
Step 6: Correct chest fit should allow a fist to be placed behind the chest strap. |
|
 |
 |
|
|
Step 7: Adjust the shoulder webbings so that when the front fall arrest point is lifted, it is level with the sternum. |
Step 8: Back Fall Arrest D ring point should be correctly sitting between the shoulder blades. Check final fit. |